Changing your Epson Inkjet printer cartridge
Never install the ink cartridge into the spare print head unit. The print head unit must always be installed in the printer, before you can install the ink cartridge. Otherwise the print head unit and the ink cartridge may become unusuable.
- If you replace the ink cartridge with a new one before the ink out light flashes, the ink indicator will not work correctly with the new ink cartridge. Leave the old cartridge installed in the printer until you are ready to replace it with a new one.
- If you replace the ink cartridge with a new one before the ink out light flashes, the ink indicator will not work correctly with the new ink cartridge. Leave the old cartridge installed in the printer until you are ready to replace it with a new one.
- If you replace the ink cartridge with a new one before the ink out light flashes, the ink indicator will not work correctly with the new ink cartridge. Leave the old cartridge installed in the printer until you are ready to replace it with a new one.
- Attempting to print without a cartridge installed can damage the printer.
- Do not attempt to replace an ink cartridge until all other procedures, such as print head replacements, are finished.
- Make sure the print head unit is installed in the printer and the power light is not flashing before you replace an ink cartridge.
Replacing the cartridge:
- Make sure the printer is on and open the printer cover
- Make sure the printer is paused and the output tray at the front of the printer is lowered
- Hold down the cleaning button for three seconds until the print head moves slightly to the cartridge replacement position, and the power light flashes when the print head is in position. Do not move the print head by hand, it will be damaged
- Lift up the clamp that holds the cartridge you want to replace as far as it will go.
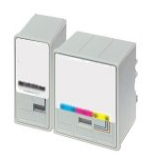
- The cartridge will rise partly out of the cartridge holder. For black ink replacement, lift up only the smaller clamp on the left.
- Lift the cartridge out of the printer and dispose of it properly.
- Remove the cartridge from its protecting bag. Remove only the yellow tape seal from the cartridge. The yellow tape seal must be removed. Leaving the tape on when you install the cartridge will permanently damage it. Do not remove the tape seal from the bottom of the cartridge.Otherwise ink will leak.
- Lower the ink cartridge into the cartridge holder with the label on the cartridge face up and the arrow on the cartridge pointing to the rear of the printer.
- Press the ink cartridge clamp down until it locks in place. Do not press the cartridge itself.
- Press the cleaning button. The printer moves the print head and begins charging the ink delivery system. This process may take a few minutes to complete. The power light continues to flash while the printer performs the ink charging operation.
- Never turn off the printer while this light is flashing. Doing so can result in incomplete charging of ink. Even if you do not press the cleaning button, the printer moves the print head and begins the ink charging process about 60 seconds after you replace the ink cartridge.
- When the ink charging procedure is finished, close the printer cover.
You are now ready to print.